
Proper HVAC duct installation is essential for airflow efficiency, energy savings, and long-term system reliability. Even high-performance HVAC equipment cannot operate efficiently if the ductwork is poorly installed.
Incorrect duct sizing, improper sealing, or insufficient support can lead to air leakage, excessive static pressure, noise issues, and uneven room temperatures.
This guide explains how to install HVAC ductwork correctly, including planning, installation steps, sealing standards, and common mistakes to avoid.

Why Proper HVAC Duct Installation Matters
Ductwork acts as the delivery network of an HVAC air distribution system. If installation quality is poor, the entire system suffers.
Common problems caused by improper duct installation include:
High energy consumption
Reduced airflow
Temperature imbalance
Increased noise levels
Premature equipment wear
A properly installed duct system ensures balanced airflow and optimized static pressure performance.

Planning Before Installing HVAC Ductwork
Successful duct installation begins with proper planning.
1. Load Calculation
Accurate heating and cooling load calculations determine airflow requirements for each room.
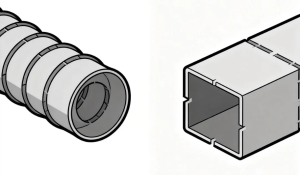
2. Duct Sizing
Duct size must match required airflow (CFM). Undersized ducts increase resistance and noise, while oversized ducts increase cost and reduce velocity.
3. Duct Layout Design
A well-designed layout should:
Minimize sharp bends
Reduce long horizontal runs
Maintain smooth airflow transitions
Avoid unnecessary fittings
Proper design reduces static pressure loss and improves airflow efficiency.
4. Static Pressure Consideration
Static pressure is the resistance air faces inside ducts. Installation must align with equipment-rated pressure limits.
Step-by-Step HVAC Duct Installation Process
Step 1: Install the Main Trunk Line
The trunk line distributes air from the air handler to branch ducts.
Ensure proper alignment
Secure sections firmly
Follow manufacturer spacing guidelines
Step 2: Install Branch Ducts
Branch ducts deliver air to individual rooms.
Maintain smooth connections
Use gradual transitions
Avoid tight elbows when possible
Step 3: Seal All Joints and Connections
Proper duct sealing prevents air leakage.
Common duct sealing methods include:
Mastic sealant
UL-listed foil tape
Gasket systems
Avoid using standard cloth duct tape, as it deteriorates over time.
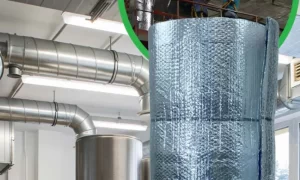
Step 4: Install Duct Insulation
Duct insulation prevents heat loss and condensation, especially in unconditioned spaces.
Selecting the proper R-value improves overall system efficiency.
(See our HVAC Duct Insulation Guide for material selection details.)
Step 5: Support and Secure the Ductwork
Proper support spacing prevents sagging and vibration.
General guidelines:
Horizontal metal ducts: support every 8–12 feet
Flexible ducts: shorter support intervals
Use vibration isolation where necessary
Improper support can cause noise and long-term structural issues.
Step 6: Test Airflow and Check for Leakage
After installation:
Inspect all joints
Test airflow at registers
Measure static pressure
Perform duct leakage testing if required
Leakage testing ensures compliance with energy efficiency standards.
Duct Sealing and Leakage Prevention
Duct leakage can reduce HVAC efficiency by 20% or more.
Common leakage points:
Joints
Elbows
Transitions
Plenum connections
Using mastic sealant is generally more durable than tape alone.
Proper sealing improves airflow consistency and lowers energy costs.
Duct Support and Hanging Requirements
Following duct installation standards such as SMACNA guidelines ensures durability and safety.
Key considerations:
Proper hanger spacing
Level installation
Avoiding excessive deflection
Maintaining proper slope for condensate control
Secure mounting reduces vibration and noise transmission.
Common HVAC Duct Installation Mistakes
1. Undersized Ducts
Causes high static pressure and poor airflow.
2. Poor Sealing
Leads to energy loss and uneven room temperatures.
3. Excessive Sharp Turns
Increases resistance and noise.
4. Lack of Insulation
Causes heat loss and condensation problems.
5. Improper Support
Results in sagging ducts and airflow restriction.
Avoiding these mistakes significantly improves system lifespan and performance.
Conclusion
HVAC duct installation directly impacts system efficiency, indoor comfort, and long-term operating costs.
Proper planning, correct sizing, secure support, effective sealing, and adequate insulation are essential for high-performance duct systems.
Following professional installation standards ensures reliable airflow, reduced leakage, and improved energy efficiency for both residential and commercial projects.
FAQ
1. How much air leakage is acceptable in duct systems?
It depends on local energy codes, but properly sealed systems should minimize leakage to improve efficiency.
2. How often should ductwork be inspected?
Duct systems should be inspected every 3–5 years or when airflow problems occur.
3. Is duct insulation required?
Yes, especially in unconditioned spaces, to prevent heat loss and condensation.
4. Can I install HVAC ductwork myself?
Small residential projects may be possible, but professional installation ensures compliance with codes and performance standards.